MOPEKS® Guide to the Laboratory
Introduction
This section, in brown italic font, appears in many places on this website for completeness - so you can skip it in future!
The purpose of this Guide is to show you how to actually use the computer program MOPEKS. If you are not a computer programmer, please read 'Guide ⇨ Basic Principles' first.
If you are a computer programmer, please read 'Guide ⇨ Key Concepts' followed by 'Guide ⇨ How it Works'. You could even buy and read 'The Book' but that may be a step too far.
You can then experiment by actually running the program MOPEKS.
Firstly, download and install MOPEKS as explained in 'Downloads ⇨ MOPEKS Program'.
Then start it up! When you encounter the Advice form (see 'FAQ ⇨ List of Forms ⇨ Form Advice') please read what it has to say. If it has any "red" content then there is a problem and you will have to do your best to solve it with the help of the 'Troubleshooting' section. By all means send me the error log if that happens - see 'Guide ⇨ Quality Control'
Assuming there are no problems, press the green "continue" button on the Advice form and you will encounter the Wizard, which is oriented towards actions. Then press the green continue button to go straight on to Reception which is oriented towards locations. Both of these forms are merely different routes to the same thing - you can regard them as being navigational aids.
Press the appropriate radio button until the Reception form looks like below. Now read what it has to say carefully - MOPEKS is complicated. It may look like a game but it is not.
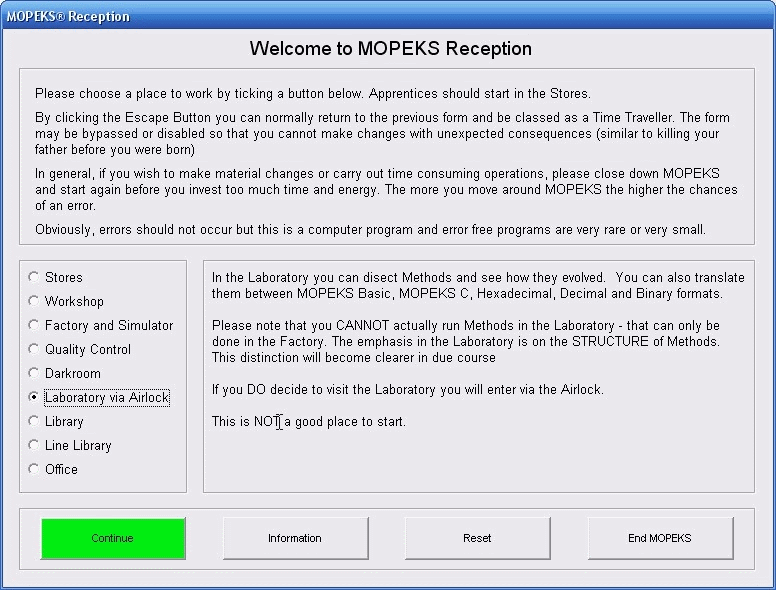 Left click on image for a full size shot in a new tab or window. Press F11 for a full screen, if you wish. Then F11 again to return
End of brown italic section!
Continue
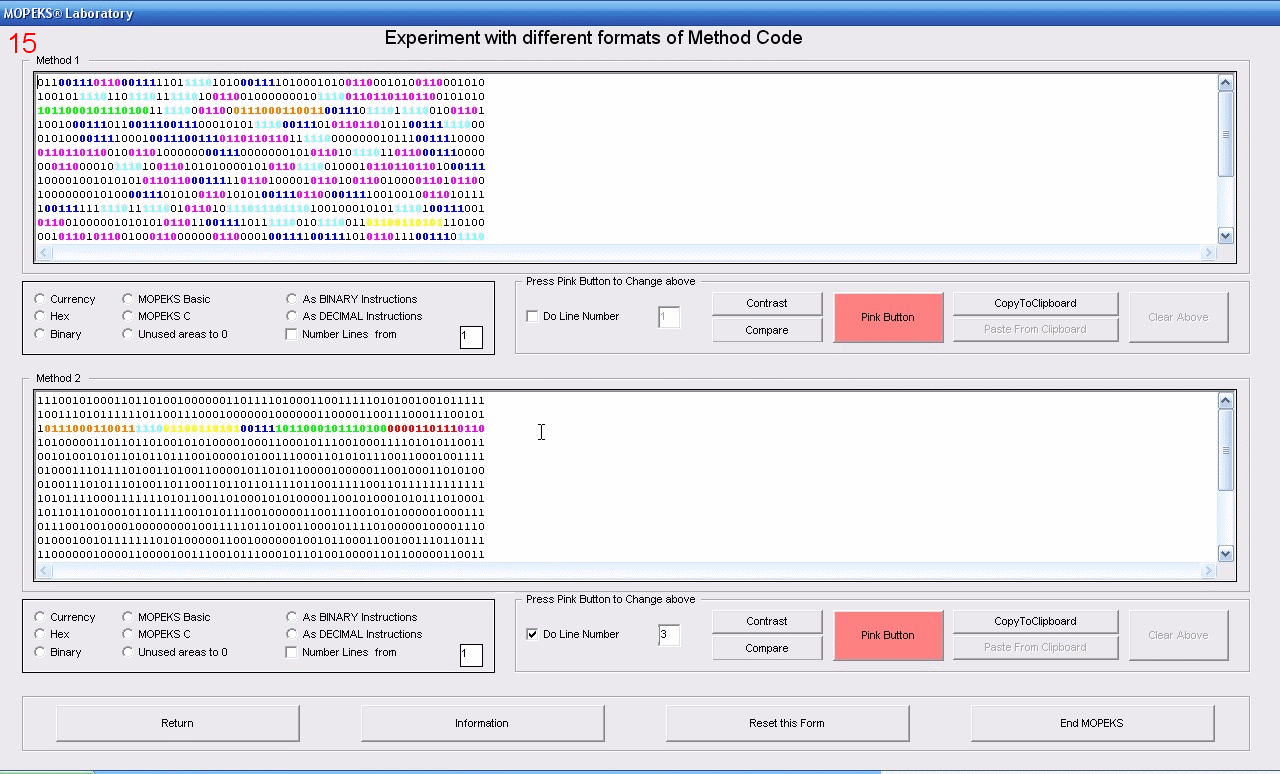
When you press the green 'Continue' button in Reception, the Airlock form will come up. Please press buttons until it looks like the screen shot below:
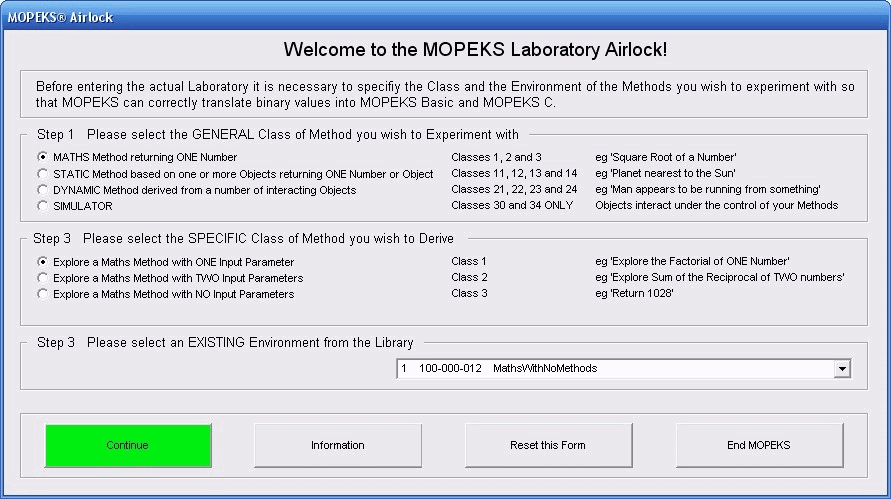 Left click on image for a full size shot in a new tab or window. Press F11 for a full screen, if you wish. Then F11 again to return
The Laboratory
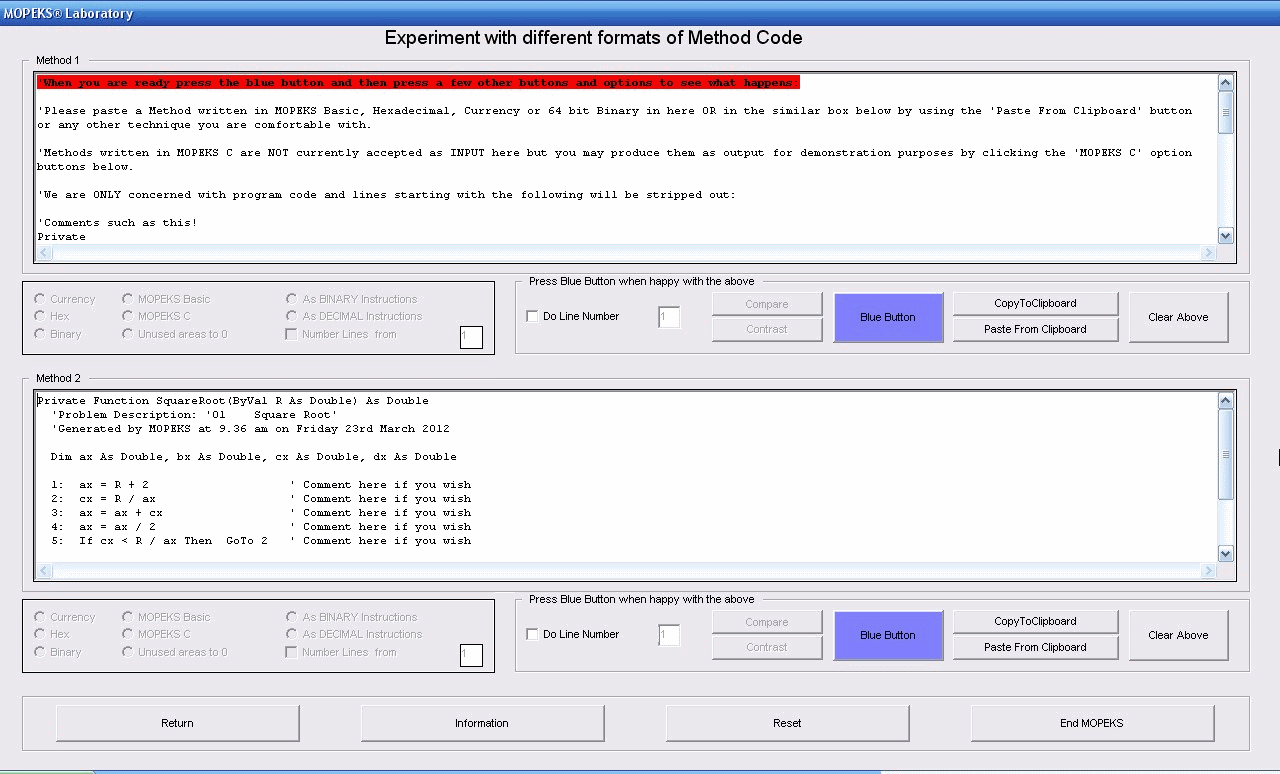
When you are ready, press the green 'Continue' button in the Airlock form and the Laboratory form will come up.
Organisation
The Laboratory is organised into two identical sections, namely the 'frames' labelled 'Method 1' and 'Method 2'. Apart from the names, they are identical in every respect and act symmetrically.
This structure enables you to compare Methods or code fragments to see how they differ from each other in their underlying structure. For example, you may be curious to see how one embryonic Method has evolved into another method. The Laboratory enables you to do that.
 Left click on image for a full size shot in a new tab or window. Press F11 for a full screen, if you wish. Then F11 again to return
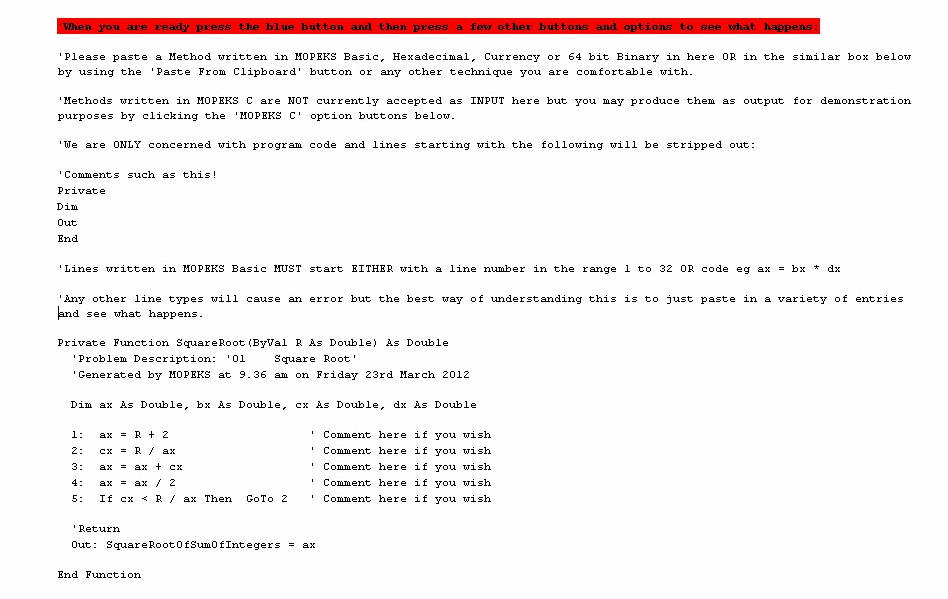
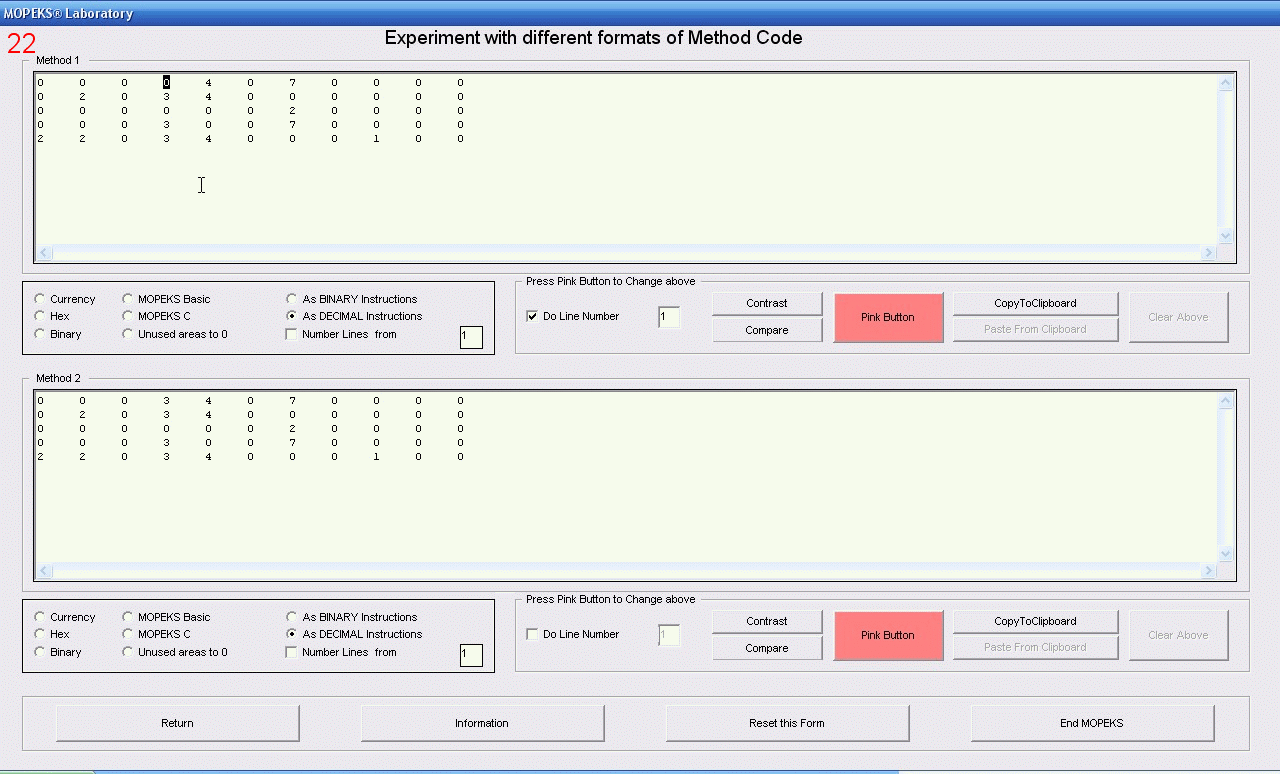
The first box should read as below. Please read it carefully until you understand it.
 Left click on image for a full size shot in a new tab or window. Press F11 for a full screen, if you wish. Then F11 again to return
Getting Started
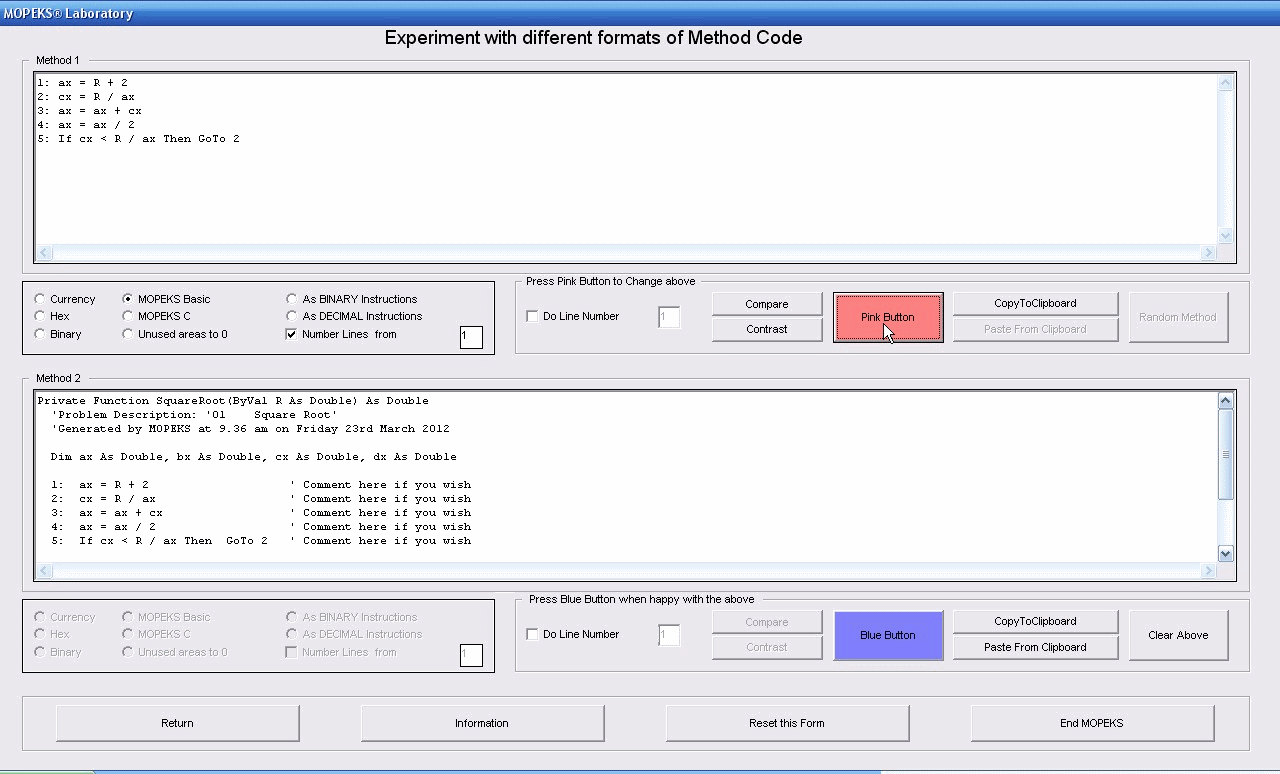
When you are ready, press the top 'Blue Button' and the layout will look like below. You can only make changes to the Method you are evaluating when the BLUE button is showing. Conversely, to actually use the Laboratory, you need the PINK button to be visible. The best way to understand this is just by experimenting. You will be warned when you attempt to do something that is impossible or not permitted.
Note that the lines in the sample Method are numbered 1 to 5. You can change that if you wish, as we shall now show.
 Left click on image for a full size shot in a new tab or window. Press F11 for a full screen, if you wish. Then F11 again to return
Line Numbering
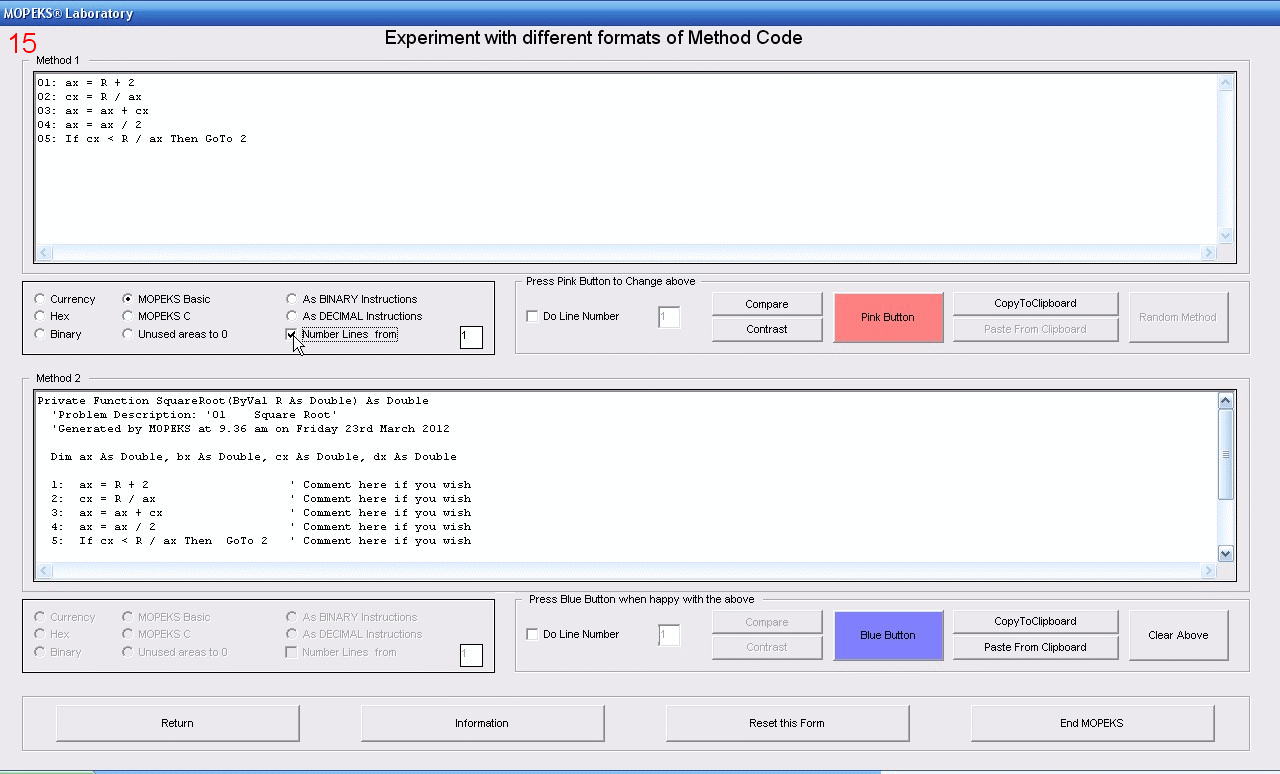
You will notice that each of the two frames has a section as below. To experiment with line numbering, click the box 'Number Lines from' and try setting different starting numbers. If you wish, you can see an animated gif demonstrating this by left clicking on the image below. Note that line numbers must not exceed '32'.
Left click for ANIMATED gif. Then Save Image to Disk and Step through as a Movie if you wish - see 'FAQ ⇨ General ⇨ Q9'
Formats
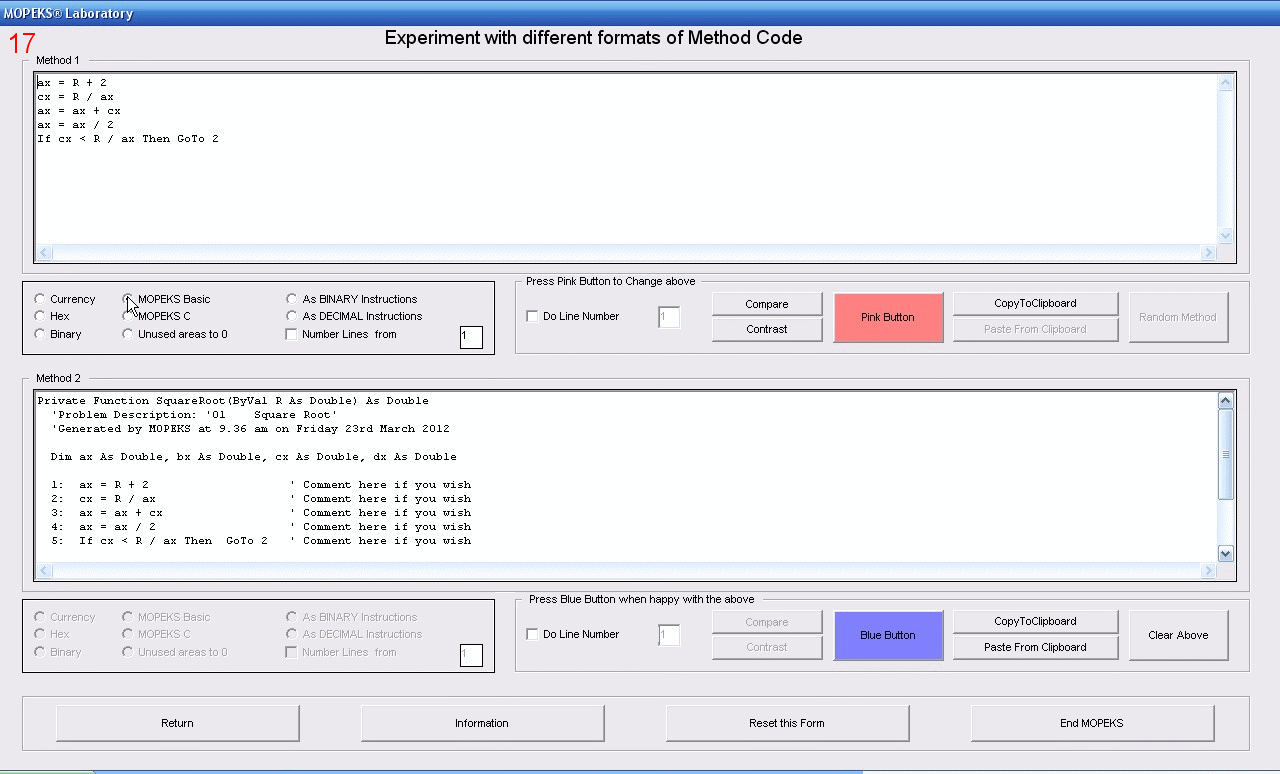
In the area just looked at you can also change the Method format. The nature of Methods is discussed at great length in 'FAQ ⇨ Methods ⇨ Q1 When you are ready, experiment by clicking on the radio buttons to see the format change. If you left click on the image below, you can see a full sized animated gif demonstrating how to do this.
Left click for ANIMATED gif. Then Save Image to Disk and Step through as a Movie if you wish - see 'FAQ ⇨ General ⇨ Q9'
Random Method
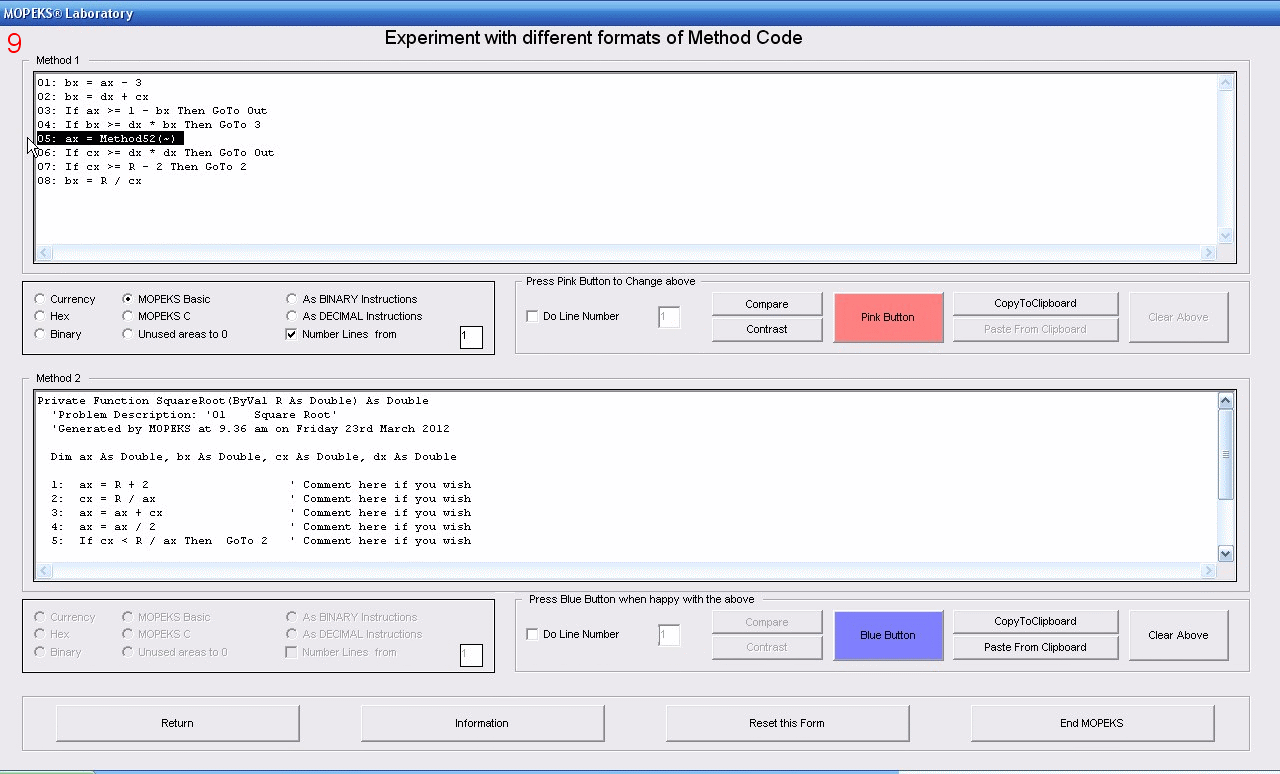
If you press the extreme right hand button you will see that it cycles between 'Clear Above', 'Show Message' and 'Random Method'. If you press the button when it reads 'Random Method', the text box will fill with zeroes and ones. This is a Method, each line of which consists of a 64 bit word. If you then press the 'MOPEKS Basic' radio button you will see this binary Method turned into code.
This process is shown in animated form if you wish to left click the screen shot below.
Left click for ANIMATED gif. Then Save Image to Disk and Step through as a Movie if you wish - see 'FAQ ⇨ General ⇨ Q9'
It must be emphasised that EVERY 64 bit word constitutes a valid line of MOPEKS Basic. The line emphasised in the animated gif reads as 'ax = Method52(~)' and if you are sharp eyed you may have wondered what it is doing in the environment 'MathsWithNoMethods' as chosen in the Airlock.
I certainly wondered myself and then remembered that all 64 bit words which start with a '7' ie '111' in binary, are methods. In practice, MOPEKS ignores methods which contain lines referring to disallowed methods and they soon 'breed out' of the breeding pool. Evolution can cope with all kinds of junk and is very robust - unlike machines designed by human beings which tend to be fragile.
Contrast
This is tricky but not as tricky as 'Compare' which follows later! Proceed as follows:
1. Press both Blue buttons and they will turn pink.
2. Press the bottom Pink button again and it will turn blue and allow you to make changes
3. Change the first line of the bottom box to read 'ax = R / 2' instead of 'ax = R + 2' then press the blue button again so it reads pink!
4. Tick the 'Do Line Number' box in the upper frame and ensure it is set for Line 1
5. Press the 'Contrast' button in the upper frame and you will see that both displays turn to binary, highlighted in green and red
6. Note that a binary value of '00' in the first line of the upper frame has changed to the binary value of '11' in the lower
frame (zero has changed to three)
7. Press the 'As DECIMAL Instructions' in both upper and lower frames and note the contrast - again '0' has changed to '3' in the first line
of the two frames.
The change from '0' to '3' occurs because '0' represents '+' and '3' represents '/'. You can see this animated by clicking the display below:
 Left click for ANIMATED gif. Then Save Image to Disk and Step through as a Movie if you wish - see 'FAQ ⇨ General ⇨ Q9'
Compare
This option looks for the largest chunks of binary that it can find. These are in the sequence of the rainbow but with red and green
reversed (don't ask). So the sequence is:
Green (largest)
Orange
Yellow
Red
Blue
Indigo
Violet (smallest)
When you are ready proceed as follows:
1. Press each 'Clear Above' button three times until each frame is filled with random binary code
2. Tick the bottom 'Do Line Number' box and set it at '3'
3. Press the bottom 'Compare' button.
4. Look for chunks of binary from the bottom frame which are present in the upper frame. Yes, I know the red chunk is hidden
in the upper frame - well spotted.
From the above you will realise that the bottom and top frames are symmetric. You can see this animated by clicking the display below:
 Left click for ANIMATED gif. Then Save Image to Disk and Step through as a Movie if you wish - see 'FAQ ⇨ General ⇨ Q9'
Copy and Paste
If you wish to move chunks of code around use the 'Copy to Clipboard' and 'Paste from Clipboard' buttons.
MOPEKS® and the Blue Logo are the Registered Trademarks of the MOPEKS Organisation
Website Published: 15th October 2013
Program Launched: 2nd November 2013
Copyright © MOPEKS Organisation 2013. All rights reserved
'MOPEKS Organisation' is the Trading name of Mopeks Ltd a company registered in England under number 07519676
The robot docking station is here
here